Hello friends!
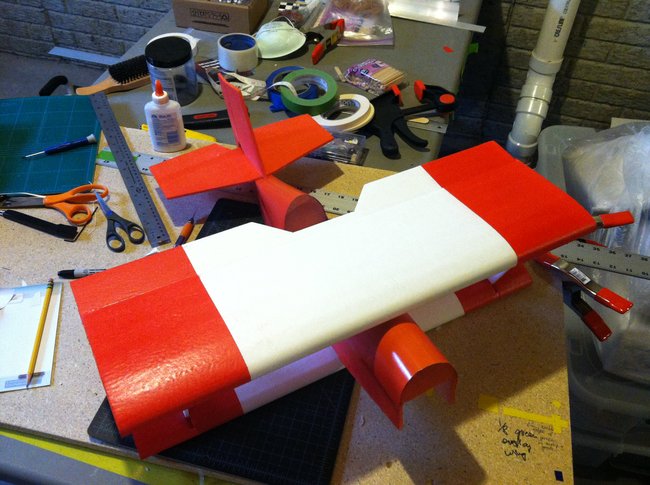
In this post I will be including my process of picking the color for spraying and applying decals for my winter project, Baby Blender.
To give a short history of my spray-painting skills: I have never spray-painted my planes. So far, I have built 3 amazing planes from Experimental Airlines' channel on YouTube and they all look amazing! This time I have decided to challenge myself and try something different with my coloring technique. In the worst case scenario, it will look like crap and I can learn from my mistakes :) So, if any of you guys feel like you can share some tips and advice about this process, please feel free to comment below.

I will probably be updating the post with the new images with the each progress I make. For this plane, I was trying to choose which spray paint to use, I love the orange that Josh has picked in his video but I was not able to find similar tone, so I went with Glossy Blood Orange from Walmart. You can see me testing the masking with it and the silver paint. I don't think I will be using silver because it came out too dark.
I would like to ask for your opinion and help me to decide which type of the decal pattern you like, at the end of the post.
I will really much appreciate it! I have numbered different patterns.
Thanks and hit me with any questions!


February 19th Update
After getting some great feedback from you guys, I understood that design #2 was most preferrable. I am not sure if it was clear but in this case, the white decal will go around the side AND will wrap around the top part of fuselage, making it almost a full body wrap which I don't mind, but it will take extra work to lign everything up. The text though is very tricky to make look in that shape as it is not very symmetrical. So, I have went clean style and crazy style to see the difference. Second choice is most funky, for sure.
I have decided to experiment with dual coloring spray painting for the fuse, I will be testing on couple of foam pieces and poster board, hopefully I will be able to film how I do it :)

Just totally random idea came to me when I looked at the curvy text I have created :)

February 21 Update
Okay, taking the fact that I have never spray-painted the foam planes before, I decided to create the test fuselages for the Baby Blender from scraps I had for that purpose only. I am using the poster board from one of the signs I had, the paper is very flexible and ligth enough, but it has text and some graphics printed on it, so I want to try painting White Gloss over and see if it covers it and also testing second fuse with just painting the Red and seeing if that covers the text.
I will be using the two test fuselages to test out my concept for the dual-color effect: the red and lighter Orange on top of fuse.
Stay tuned for more pictures and videos of my progress.


Results of the Spray Painting Baby Blender Fuselage

March 9, 2013 - Finally Warm Enought to Paint the Plane Parts
Okay, finally this weekedn it's not -20 or 0 degrees, it was in mid 40s and I decided to fiinally finish all my painting stuff so I can put the plane together. Here you go, I have applied a light coat of orange on top of my fuselage, final results of masking and painting are below. I am making another short post about Adding a Pilot Cockpit :)
Next step is cutting decals and applying to the plane.


March 11: Laying Out Decals for the Plotter
This is what my files usually look like before I send it to the cutter.


Log In to reply
Log In to reply
Log In to reply
Log In to reply
Log In to reply
Log In to reply
Log In to reply
Log In to reply
Log In to reply
Log In to reply
Log In to reply
Log In to reply
Keep up the great work!!!!!!!!!!!!!!!!!! ;)
Log In to reply
Log In to reply
Log In to reply