Since I've started flying a few months back I've been doing all I can to get others into the hobby. (I must admit it's partly just to have someone to streamer combat with.) That being said I only have one transmitter at the time so anytime one of my friends takes the sticks it's a bit of a risk.
Long story short a full throttle nose first grounding of my FT Flyer left me a pile of foam board and a Turnigy Park 300 1380KV motor without any motor leads. After placing an order for a replacement I thought there must be a way to fix this. After tearing into the motor and realizing there was no way to re-solder the joints I went on a hunt of how to re-wire a motor.
My search lead me to IBCrazy's wonderful article on RC Groups which can be found at http://www.rcgroups.com/forums/showthread.php?t=666877 , what a well written article and full of great information. After some more research and three different motor wrap attempts I decided to make a video to help out anyone out there looking to re-wrap there own motor.
Just a heads up, failure is always an option and should not be cause to worry, there is always something to learn from it. For instance my first motor wrap was with 30AUG wire, 22 wraps per stator armature. It could spin any size prop you wanted but didn't have enough speed for well... anything. My next attempt went to the opposite end of the spectrum. 20AUG wire with 4 wraps per armature. It could probably have flown a small house, however at the cost of 85AMPS at full throttle.... on a 300 Series Park... woops. Learn from what you do and don't give up. However pay special attention the insulation of your stator and your wires. A short inside the motor can very quickly fry your ESC.

Try to do a better job then I did winding the wires as neat as possible. It will make your wrap much more efficient.

Also as I'm sure you've noticed, be sure and keep rouge paper towels far away from your stator while securing your wires. I haven't noticed any performance issues from the paper towel being stuck the the wire but I know the day is coming when It will heat up enough to cause a little smoke and worry me. It also completely kills the pride in "Look what I did, just ignore the paper towel" :-/

As you can see I did not run the leads through the standard wire outlet!

Now is a great time to use a small cloth to clean the inside of your bell to try and remove any slight rust / corrosion / dust build up.

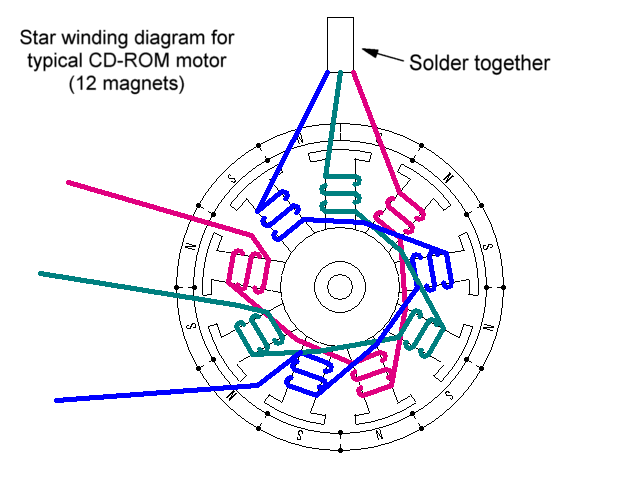
Star or WYE Termination Style (The style used in this video)

Delta Termination Style
Links and Credits:
IBCrazy's article that got me started re wrapping my own motors:
http://www.rcgroups.com/forums/showthread.php?t=666877
3-D model used in images created by A.Koehn and can be found at:http://sketchup.google.com/3dwarehouse/details?mid=9cdf12b89a22095eec1735dccb170a66&prevstart=0
Wonderfull resources for the beginner winder and the source of above diagrams:
http://www.bavaria-direct.co.za/models/motor_info.htm
Outrunner Wiki:
http://en.wikipedia.org/wiki/Outrunner
Wire Gauge Converter:
http://www.engineeringtoolbox.com/awg-wire-gauge-d_731.html
Please comment below or PM me with any questions. I love feedback about my articles and will respond to any comments as quickly as I can. Thanks for looking and Happy Flying.


Log In to reply
Log In to reply
Log In to reply
Log In to reply
Log In to reply
Log In to reply
Log In to reply
Log In to reply
Log In to reply
Log In to reply
Log In to reply
Log In to reply
Thank you
Log In to reply
Log In to reply
Log In to reply
Log In to reply
Popsicle sticks, bamboo skewers and credit cards are your friends when you do the motor rewinds.
Use of these enamel friendly tools help drastically reduce your chances of chipping the enamel off from the stator as well as the insulation on the wires.
Also, try gobrushless.com for high temp rated wire. Have had nothing but great results with this stuff. http://www.gobrushless.com/shop/index.php?app=ccp0&ns=catshow&ref=magnet+wire+std
Log In to reply
Log In to reply
Log In to reply
Log In to reply
Log In to reply
Log In to reply
Log In to reply
Log In to reply
Log In to reply