I wanted to flash my Turnigy Plush 18A ESC with SimonK firmware but I did not have the usb programer (and HobbyKing USBasp was out of stock). However I had Arduino Uno laying around and I wanted to utilize it. So here is how I did it:
Prepare Arduino
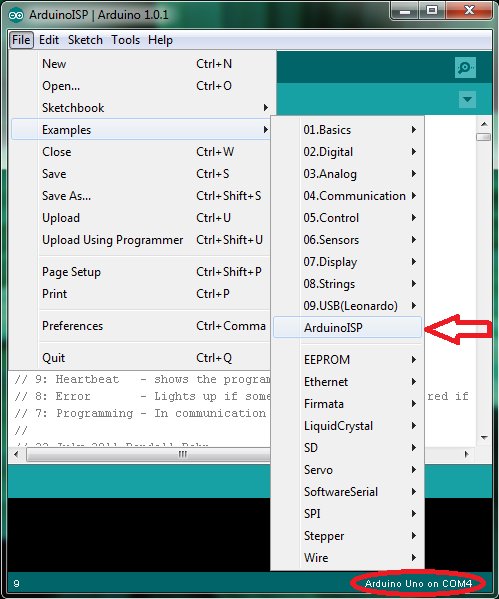
Load and flash ArduinoISP sketch to your Arduino Uno and remember on which COM port is your Arduino connected (in my case it was COM4)
Important part is to put 10uF capacitor between RESET signal and GND. Minus leg of the capacitor (the shorter one) goes to the GND
I connected the signals in the same order as the pads on the ESC
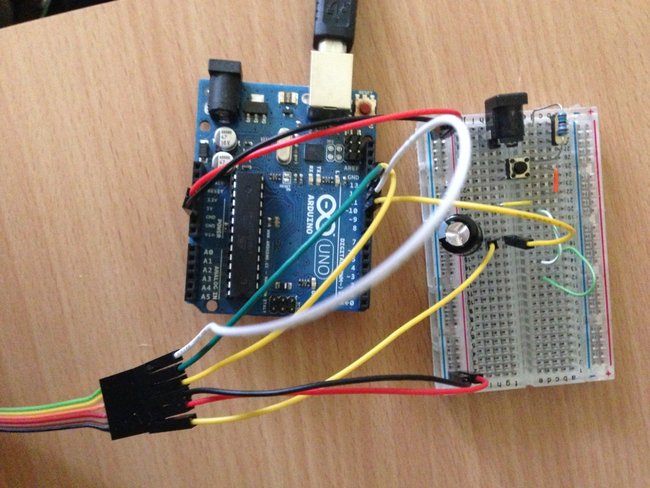
Programing cable for ESC
For Identifying singals pads on the ESC I checked great forum thread http://www.rcgroups.com/forums/showthread.php?t=1513678 with lot of resources about flashing SimonK
I decided to solder cable (so I can have reliable connection) directly to the ESC programing pads as they were on nice spot in one row. This is the programing cable I made for that purpose (cable strands are pre-tinned).
I also pre-tinned pads on the ESC for really easy soldering on and off the board
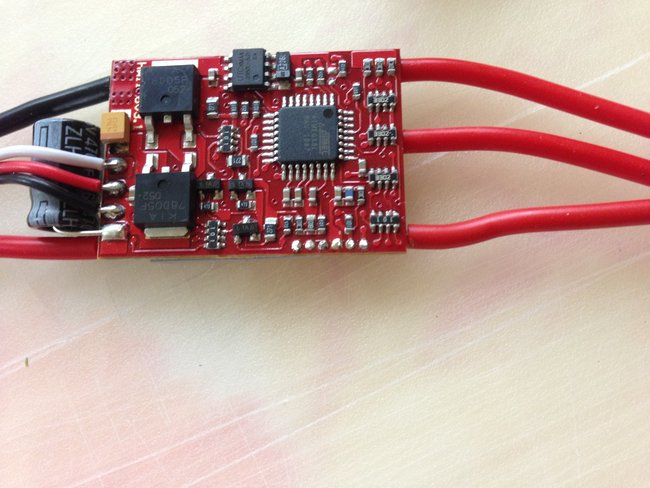
Then I just laid the cable over the pads and pushed a bit with soldering iron
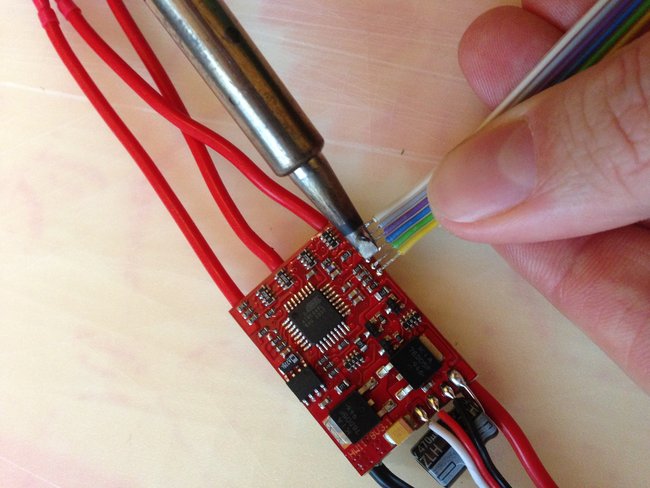
It might look complicated but to pre-tin pads and to solder the cable to ESC took only couple of seconds and you get the nice warm feeling that if something goes wrong with programming it wasn't your hand shaking while trying to hold the connection on the pads :)
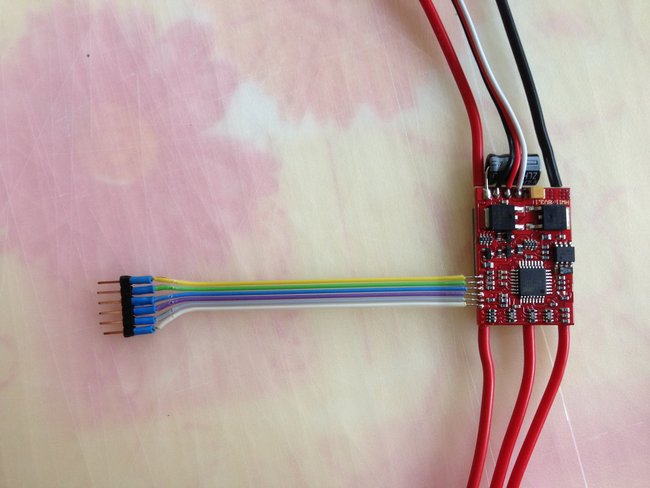
All I had to do now was to connect the pinhead to the other end of the cable comming from Arduino which had already correct order of the signals on
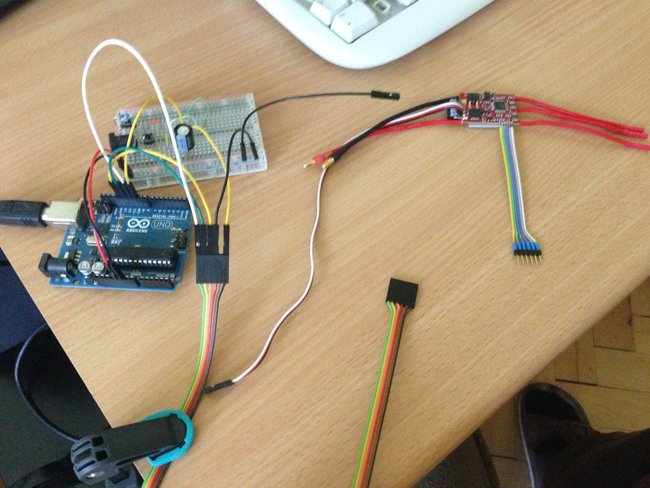
(note: I'm missing +5V signal 'red cable' in this picture)
The flashing part
First of all you need to know which .hex file is for your ESC. There is nice google spreadsheet out there https://docs.google.com/spreadsheet/ccc?key=0AhR02IDNb7_MdEhfVjk3MkRHVzhKdjU1YzdBQkZZRlE#gid=0 (you will find it also in the forum thread I posted above) For my Atmel based Turnigy Plush 18A ESC it was tgy.hex. For you it might be something different so just replace tgy.hex with your hex file in the commands below.
AVR dude
I installed AVRDUDE based on these simple steps http://www.ladyada.net/learn/avr/setup-win.html
Download SimonK firmware
I downloaded it directly from SimonK git hub repository https://github.com/sim-/tgy under the "Tags" tab and selecting latest zip file. This will download sources only so you need to build it to get to your .hex file.
I used AVRA 1.3.0 on macbook to build the sources. I installed it using home brew http://mxcl.github.io/homebrew and then just by typing in console:
brew install avra
After that I just navigated the console to the downloaded SimonK sources folder and typed
make all
It creates all types of .hex files and I chose the one for my ESC
Preparing flashing
Connect everything and check that all comunication is working by executing this command and changing the COM4 to whatever port your arduino is at
avrdude -P COM4 -p m8 -c arduino -b 19200
You should get output similar to this

When we get this output we can proceed to flash the firmware (note: I had tgy.hex in the folder from which I was executing the command. eg.: C:\Users\myUserName>avrdude .... -U flash:w:tgy.hex - so the tgy.hex is located in C:\Users\myUserName\tgy.hex) You might need to change tgy.hex to different .hex file based on your ECS
avrdude -P COM4 -p m8 -c arduino -b 19200 -U flash:w:tgy.hex
Succesfull output
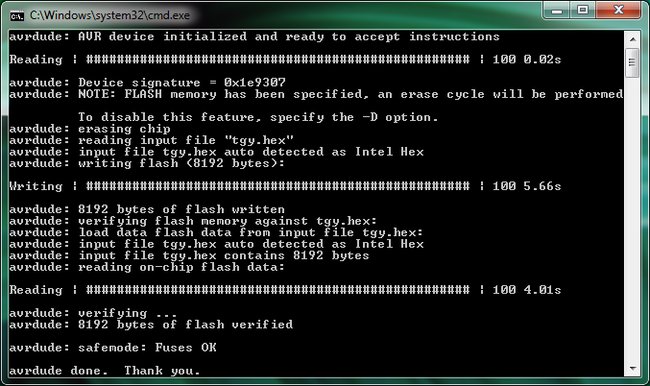
First startup of ESC
You never know if the manufacturer of the same ESC suddently did not change the arrangement of the circuit so the .hex file you just flashed might be incorrect even though for other people it works fine.
I followed recommended procedure described at https://github.com/sim-/tgy/blob/master/README.md under Instalation section with 4 AA bateries as I do not have current limiting power supply.
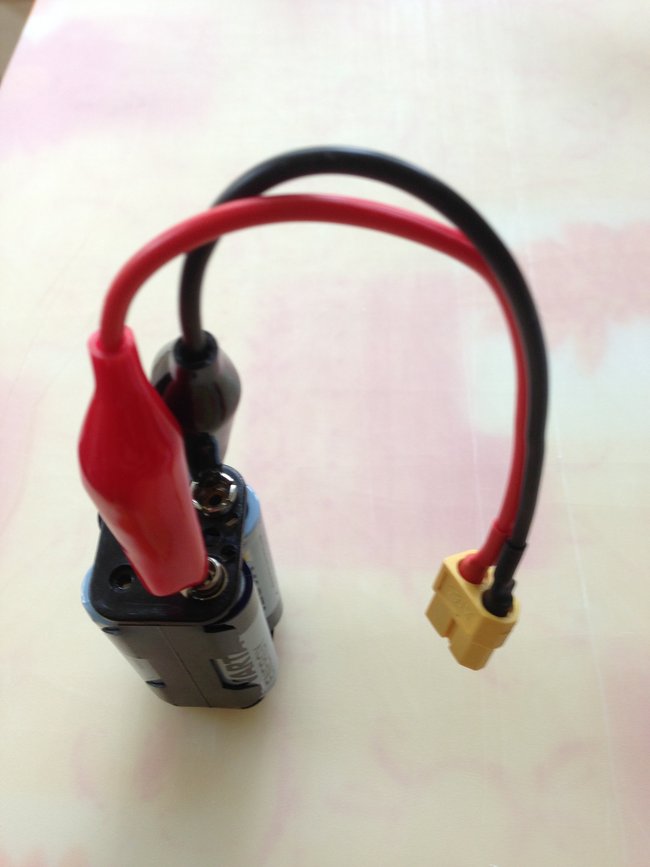
Motor would not spin with 4 AA bateries but you can hear the startup beeps and check if all of them where played. After that I connected real LiPo pack batery and tested the motor spinning without propeler.
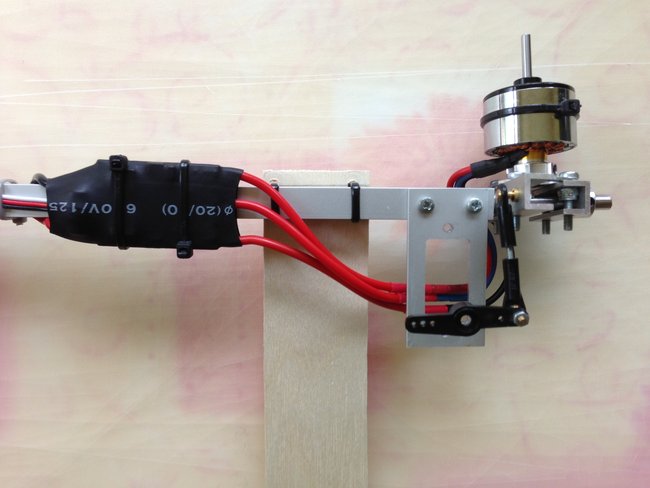
As all went perfect I just covered the ESC with new heatshrink tubing, mounted them on my tricopter and calibrated them using KK2 board.
Happy flashing!


Log In to reply
Log In to reply
Log In to reply