One thing I've noticed about Adams foam board is that 90-degree joints tend to come apart during a crash. This article describes how to build stronger joints by borrowing a technique from woodworking.
The box joint is a common joint in which the two edges of the material are cut into interlocking straight pins. As the name suggests, these joints show up most often in plywood or softwood boxes, which have a lot of 90-degree joints and need to be strong and cheap to build. The box joint strikes a good compromise between strength and simplicity.

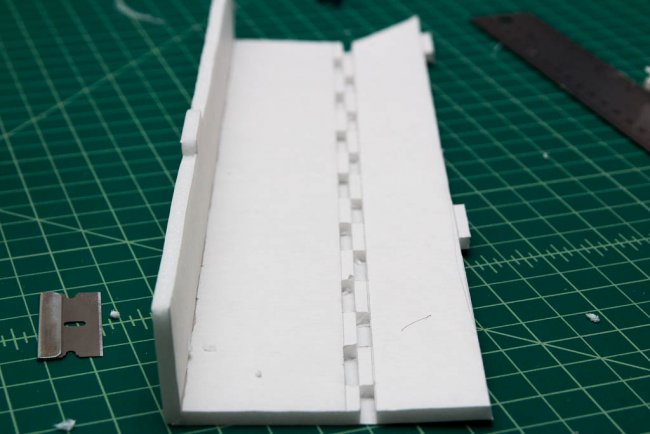
I've taken to using box joints with Adams foam board whenever I need to build a joint that will survive a crash. As an example, here's a foam shield that I made to protect the battery on the outside of my swappable power pod:

The foam has taken quite a beating, but the two joints are completely intact.
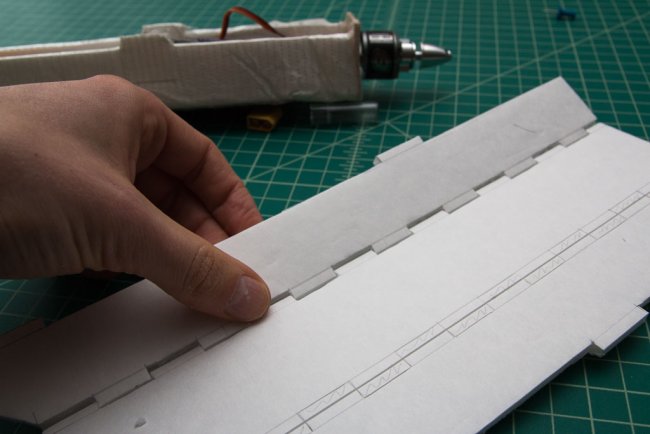
Another reason to use box joints is that they give you more working time when you need to do several joints at once. A box joint is self-clamping; the joint will stay together without glue, from friction alone:

This property allows you to use a glue that sets in minutes instead of seconds, so you can take your time making sure that everything is straight. Good options include Gorilla Glue, wood glue, craft glue, and epoxy.
It's easy to modify an existing Flite Test plan to use a box joint. Take an "A-style" or "B-style" fold and add 4mm (the width of a sheet of foam board) to the width of the joint area. Draw three parallel lines 4mm apart, then draw perpendicular lines at regular intervals (2 cm in this case). Then mark the resulting rectangles in a checkerboard pattern, as shown below.

Here I've taken the plans for a power pod and converted the two "A-style" butt joints into a pair of box joints. The rectangles that I've marked are the areas where I'll remove the foam. Before removing the foam, you need to make 50% score cuts along the edges of those rectangles. I like to use a razor blade to cut the long edges:

...and a hobby knife to cut the short edges.

Be careful not to cut through the paper on the other side. Next, fold the foam board back along the center line and gently trace the edge of each shaded rectangle with a hobby knife.

Use your fingernail to remove the rectangles.


Then clean out any remaining foam with a scraper razor, again being careful not to cut through the paper.

When you're done removing the rectangles, you should be left with a raised checkerboard pattern. Fold the joint up.


If you've cut the pins straight, the joint should hold itself nearly square with no glue. If you're in a hurry, you can open the joint back up and run a zig-zag line of hot glue down the center at this point. Here I'm using white Gorilla glue instead. I put a drop of glue into each slot, then used one of the discarded bits of foam to spread the glue evenly throughout.


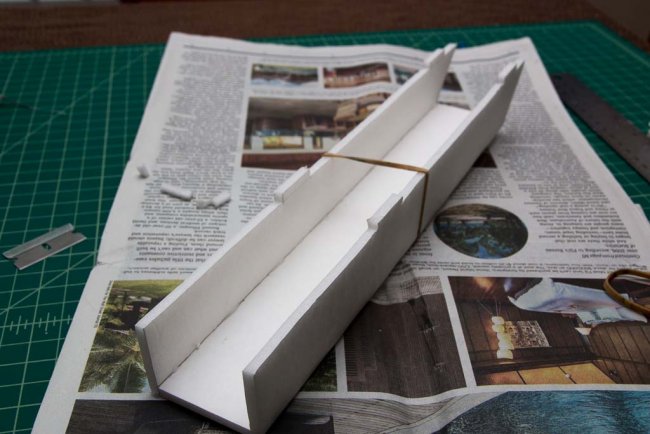
A single rubber band is sufficient to clamp the two joints. Because the paper along the outside is under tension, the joints really don't want to bend past 90 degrees.

After about 5 minutes, use a scrap of foam to squeegee up any excess glue that foams out of the joint.

After 15-20 minutes, the glue has set up enough that you can make any final adjustments to the angle.

Here's final result from the outside.


I can see someone inventing a simple tool to do all the cutting at once.Something other than a laser cutter, that's the easy way out.
Log In to reply
Log In to reply
Log In to reply
I suppose it holds more effectively because of the increased surface area between then joints.
plus the added friction.
Log In to reply
Log In to reply
A *much* simpler solution is to do a 50% score, bend, and then add a 45 degree bevel to each side.
Log In to reply
Log In to reply
Log In to reply
Log In to reply