Hello everyone. Here is a quick tour through the mods I made to my Hobbyzone Super Cub LP. Hopefully it will help or inspire anyone thinking of modifying their own.
In order to help me make the best articles possible, please rate this so I know if you liked it and all comments are appreciated. Thanks.
I'll be covering the following mods.
Brushless motor and esc conversion.
Aileron and Flap wing mod with straightened wing.
Larger wheels and tail wheel.
Battery compartment conversion to handle a 2200 mah 3s battery pack.
Drop mechanism.
Increased tail throws.
Brushless motor conversion:
The reason I made this switch was because the original ESC/Receiver died after I dunked the plane under water with a bad landing on floats. Making this change requires replacing the Motor, ESC and receiver.
**NOTE-this arrangement only works with the DSM2 compatible planes. If you have the FM version then you must also replace the tail servos as they are not compatible with DSM2 receivers.**
I used a Turnigy EasyMatch Park 480 motor with a 40amp Turnigy esc. It's a ridiculous amount of power. When I put the floats on it takes off in under ten feet every time and is capable of hovering with the added weight of the floats, mods and heavier battery.
There are machined mounts available for purchase but I made mine from balsa and screwed it into the existing firewall so the angles stay the same. It flies like a dream.
The only trick is to measure the distance from the firewall to the propeller and make your mount so that the propeller still clears the cowling. Otherwise keep your dimensions close to that of the original drive system so the thrust line is close to the same.
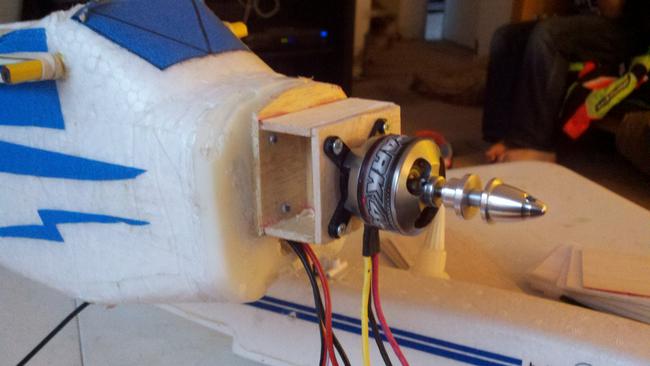
I then mounted the ESC under the motor. It helps with the center of gravity and keeps the ESC in a constant flow of cool air. I fly it on floats regularly and I've never had any problems having it there.

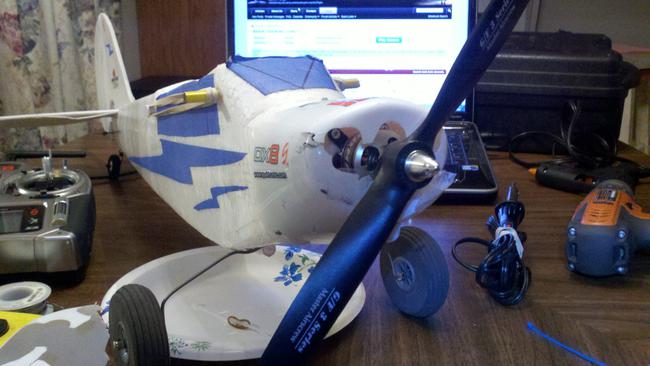
Spend a little time aligning it with the cowling (I did not) and it looks like factory new.
Aileron mod.
This is a great mod once you've mastered the 3 channel flight and want to move on to 4 channel.
All that's required are two servos and a y harness (again, this only works with the DSM2 compatible machines) and some tape.
First you need to figure out where you want your servos and how long your ailerons need to be. Your mounting position can be very close to the fuselage without affecting the performance of the ailerons. You will have to run the y harness to the receiver and leave yourself some room to work when plugging things in and mounting the wing.
This mod goes will with the straightened wing mod. The dihedral (upwards angle) of the wing is critical in operating the plane on 3 channels. It's what keeps the plane upright. By it's nature, it fights against the roll of the airplane and therefore fights against the efforts of the ailerons. You can start by adding the ailerons and keeping the dihedral for a while until you get the hang of it but you will definitely want to straighten the wing at least some to get the real feel of a 4 channel plane. I always start by straightening my wing and that's what you see in the pictures but we'll cover my method of straightening the wing in a bit.
Mounting the servos can go a few different ways but flush mounting them has been very simple, effective and durable in a crash (or several). You just mark out the position of the servo and cut the foam out, then glue it in place and tape over the body.
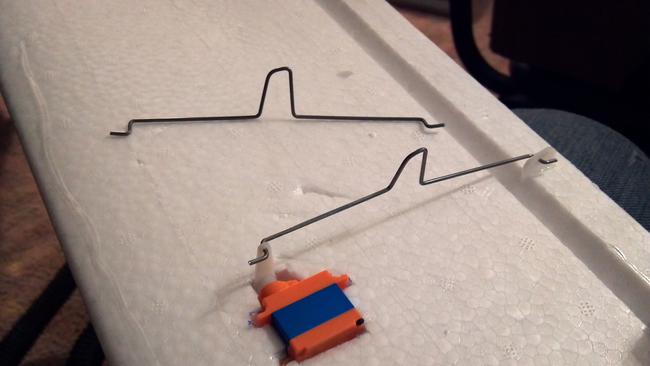
In this picture you can see my adjustable linkages made simply out of some wire. They aren't perfectly matched or anything, just made by eyeballing it with two pairs of pliers. They aren't as light as some but this plane is more than capable of carrying weight. They are easily adjusted by opening or closing the gap once things are installed. Once you set the surfaces straight with the servos centered a little bit of trim in the air is all it takes.
On the other end, I have used scrap pieces of plastic with a hole drilled in them or spare servo arms for control horns. I simply cut a slot in the aileron and poke the arm through and secure it with a little foam safe CA.
Here's a picture of my ailerons as I'm marking and cutting them out. I am also adding flaps.
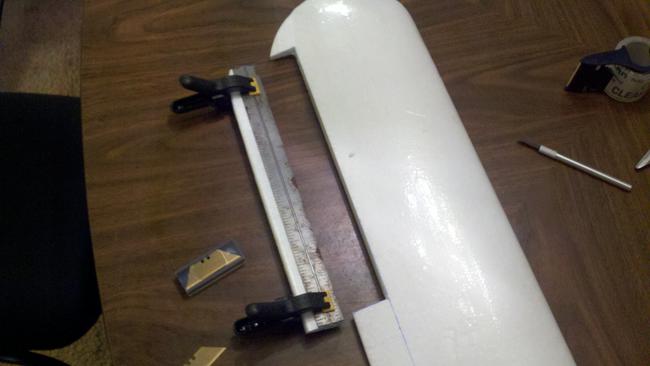
I made mine 12" x 1.25" and the performance is really good. With the flat wing, the roll rate is adequate and still works well at low speed. I set up my flaps to mix with the ailerons working as one large aileron. My original modded wing had 16" ailerons which is my recommendation if not doing flaps. Next is beveling the control surface to allow it's movement in both directions.
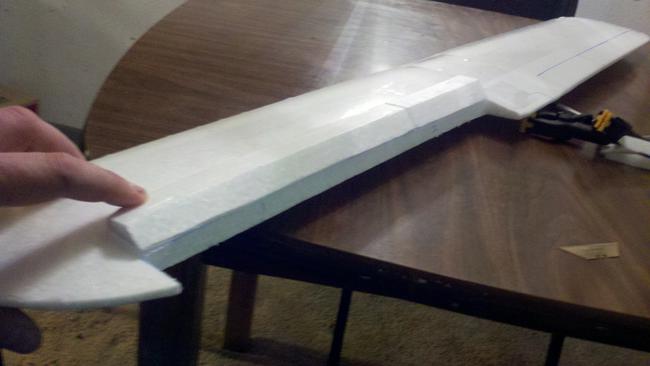
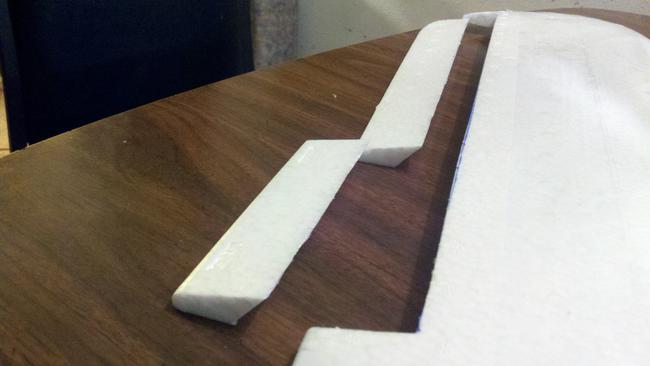
Now lay the cut out pieces in place against the wing, note clearance on all sides and leave about a 1/6th" between the ailerons and the wing. Tape across the top. This forms half of the hinge. Now fold the ailerons completely on top of the wing and tape across the exposed sides, this will be the other half of the hinge and create a tight, sealed piece that doesn't come off in even the worst crash. Leaving the gap in the first taping allows room for the two pieces to flex. If you tape it right up tight against the wing it will severely limit the throw of the aileron. Now look at all sides for any binding and if you have flaps. check the area in between. If you were off a bit when taping, the aileron will swing slightly to one side. You can compensate with a little trimming on the ends.
Hook up your servos and linkages and set your lengths so the ailerons are straight with the rest of the wing with the servos centered. I have my travel at about 45 degrees maxed out for the most performance. You can always tune it down in your radio if you have that capability or by adjusting the position on your servo arms and control horns.
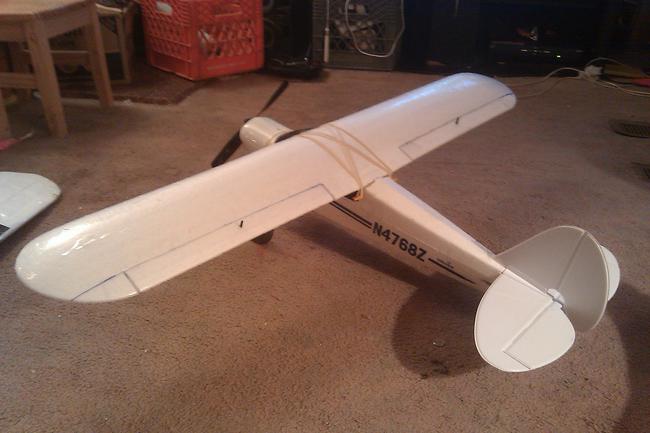
If you are adding flaps, it just more of the same. You mark everything the same, tape it all the same, same servos, same linkages, the only difference is that you want the flaps to travel intirely in the down position so you flip the pieces over and tape them on the bottom. I still beveled them the same so that they could be mixed and used as one long aileron as I mentioned before but you could get away with not beveling your flaps.
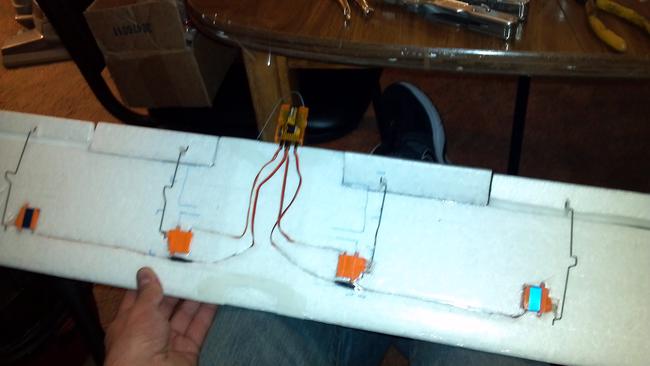
I have found that the easiest way to run the wires is to make a 1/4" cut where you want the wires and tuck them inside then cover the whole thing with clear packing tape. Note the servo positions. You can mount the ailerons opposed like this with a y harness and get the proper direction of travel. If you are running your flaps on a single channel with a y harness you will need to mount them both in the same direction, evenly spaced for weight and simply change the position of your control horn. Another option is to buy a channel reverser and put it inline.
I am running a Hobbyking Orange rx 9 channel to accomplish all my functions and I found it easier to mount the rx on the wing and run the rest of the leads to it on extensions.
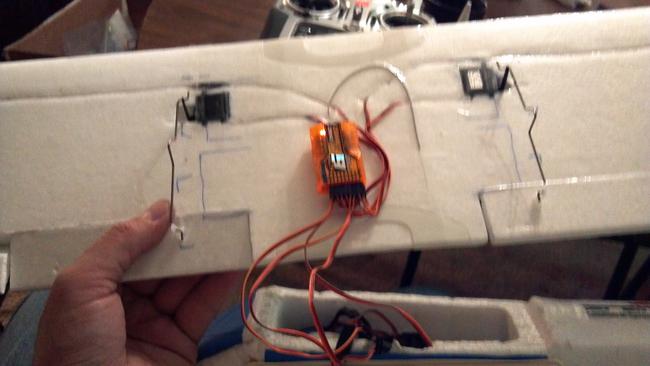
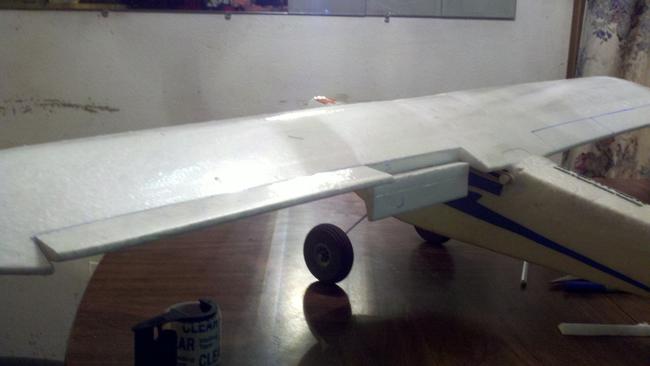
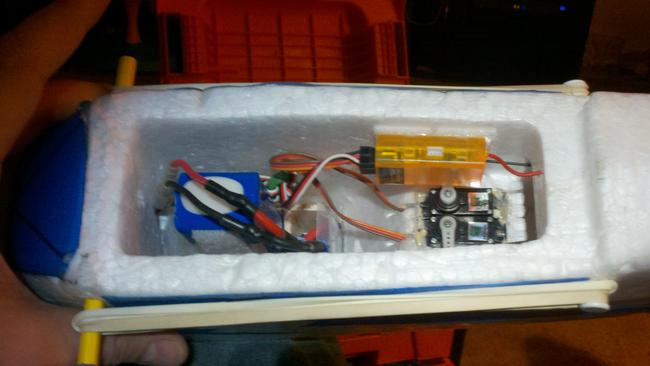
Here's my layout with the 6 channel before I added the flaps, you will also see the battery box mod I made to accomodate the 2200 mah battery. If you are just adding ailerons, you can plug them into the stock DSM2 receiver/esc unit as it comes with an aileron port.
Now I'll share my method for wing straightening and strengthening.
TAPE
Clear packing tape is your cubs best friend.
Here's a stock wing before any work is done.
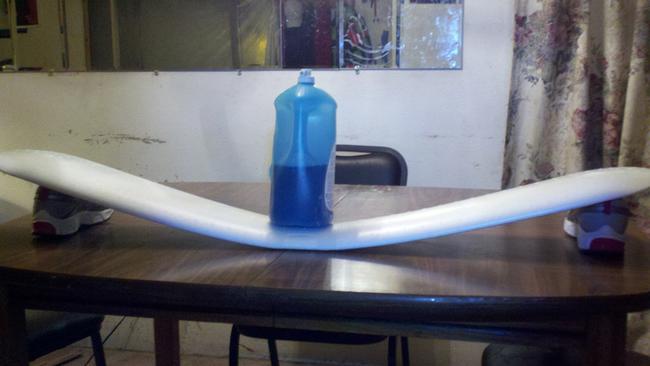
And here's a wing that's been taped on top and most importantly the bottom.
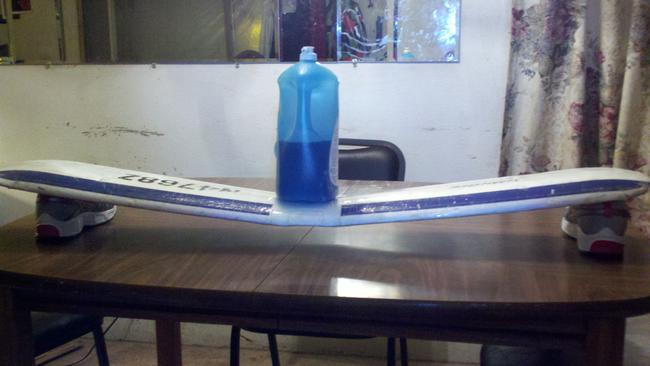
This is a great mod because it allows you to fly without the pain in the butt struts that come stock and break all the time. I tried flying without them before I strengthened the wing and I broke the wing in a high g pull out.
Now here's how I straighten it. I don't do any cutting or any carbon rods or anything, I just tape. The trick is to tape it only where the bend is. If you tape it all the way across it will warp the wing in all kinds of directions.
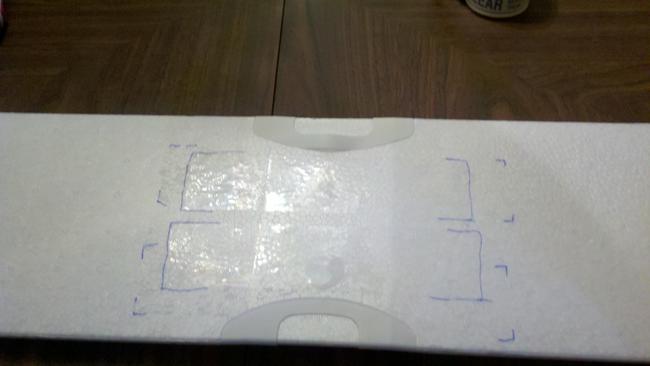
Place the wing on a couple supports, (I put it across my lap and did it)and press down in the center until the wing is bent past straight and tape it only in the area shown below. Once you get the angle you want then tape it again below so that the whole wing is at the correct angle. This will take some trial and error to get the wing tensioned correctly and everything straight.
Once you get the wing straight and even from from to back, run strips of tape across the whole wing from wing tip to wing tip. Do this starting at the back and work toward the leading edge. Keep a little tension on the tape as it's not the tape sticking that's doing the work, it's the tension of the tape that holds the wing rigid. If you get some camber in the wing from having the tape too tight on the bottom you can pull it back the other way with tape on the top.
****It's the tension of the tape on top working against the tape on the bottom that makes the wing rigid****
If the tape is applied loosely it will not give you the desired results.
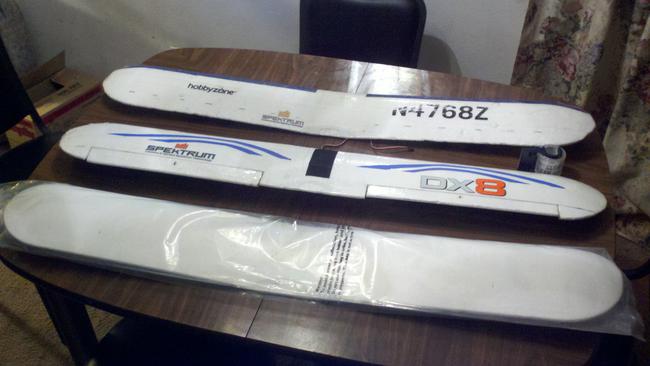
Here's a comparison of my stock strengthened wing, my flattened aileron wing and the new in the bag stock wing before I added flaps and ailerons.
Now let's go revisit that battery box.
Basically, I was having trouble with the stock batteries not providing enough amperage for the brushless 480 motor. I solved it by using a higher C rated battery which happened to be the 2200's from my helicopter. I needed a better way to mount them without pulling the wing off every time so I decided to mount it vertically in the old battery compartment. The CG is close enough with this that I didn't have any trouble flying it.
I cut out the top of the old box, braced it with pieces of balsa and added a spot for the wiring to run and notched it out so the wires would fit with the stock door closed. It's all experimental so I don't have any dimensions for you. I've found that the velcro on the sides of the battery that I use to hold it in the helicopter work well at keeping it from moving around in the plane.
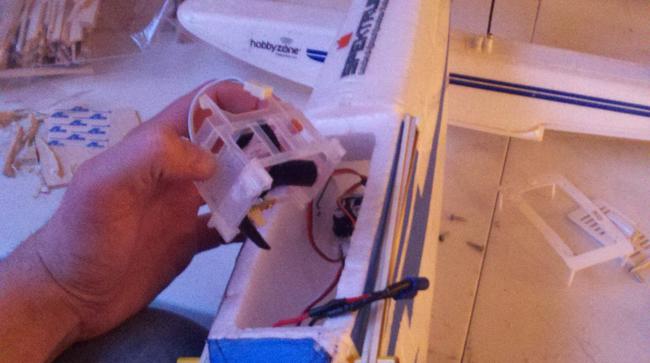
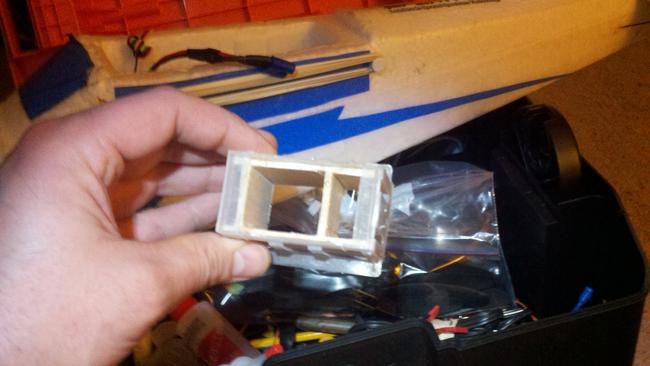
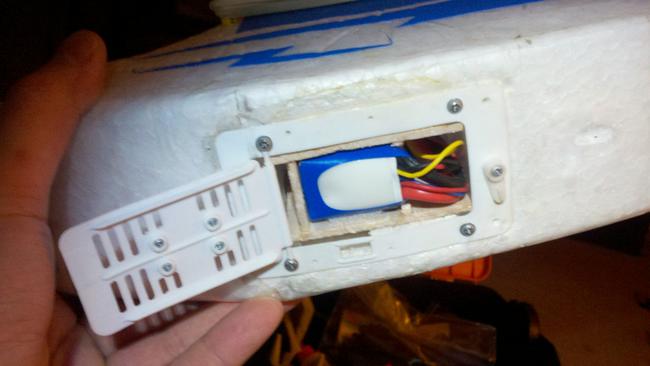
Note that the stock battery still fits but with the 2200 I can easily fly for over 30 minutes.
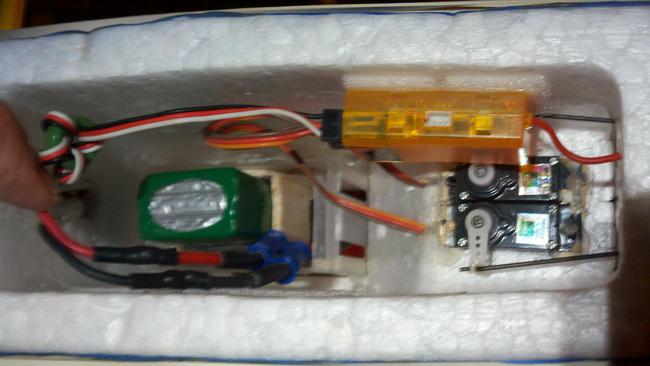
Let's see, what else is there? How about a larger tail wheel to keep from hanging up on rocky taxiways?
I used a stock main wheel off of an old plane, about a 1" diameter. All it takes is a little adjustment with some pliers and the existing wire. It seems like nothing but it makes it a whole lot easier to turn on rough ground.
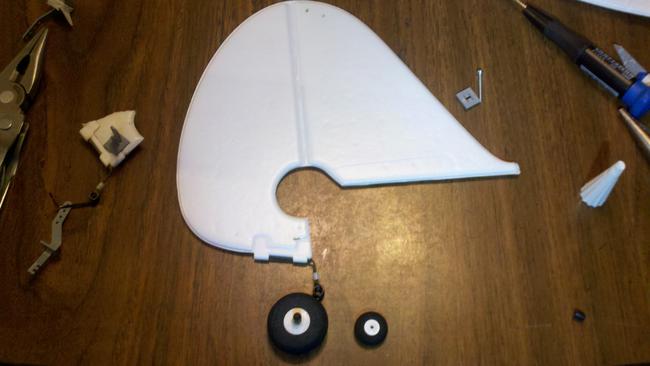
As for main gear, you can fit a 2.5" wheel on the stock wire gear. I made my own wire from some 1/8" I found and fit 3" wheels using collets like bigger models. I need new wire because there's not enough spring in mine anymore.
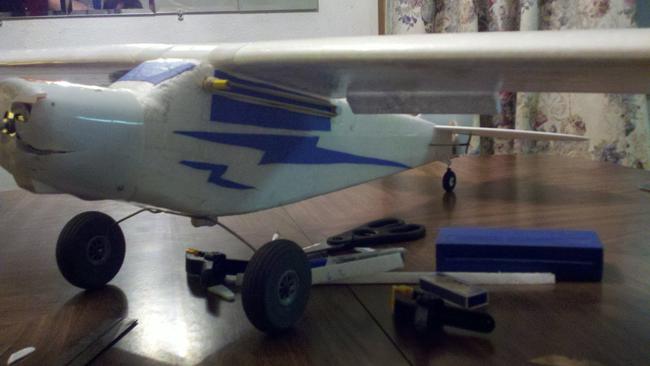
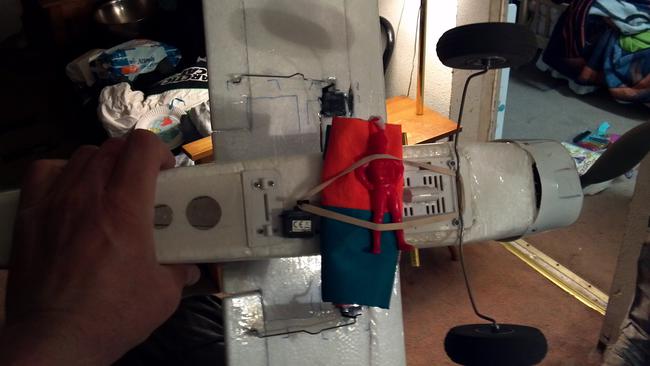
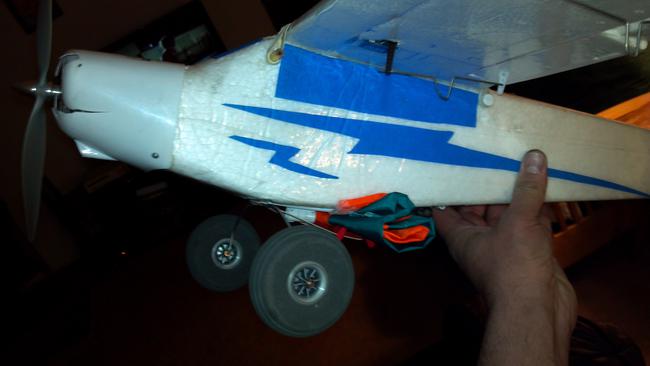
The drop module was probably my favorite part of the stock supercub. My kids loved chasing it around. Having changed everything out to new electronics (minus the tail servos) the original didn't work anymore, plus I wanted to carry larger items. I found the easiest answer I could imagine. A single servo glued to the bottom of the fuselage and a rubber band around the main gear works amazingly well. I ran the servo lead through the existing hole for the old ACT sensor. A little foam safe CA and a rubber band and I can easily carry pop cans or things of similar diameter. I find those fun to drop on targets and I bought a much larger parachute that the kids love to chase as it falls.
The servo arm will hold as long as there is power to it and the rubber band is down near the pivot. If you have it to high it will strain the servo and cause a large draw on the electrical system.
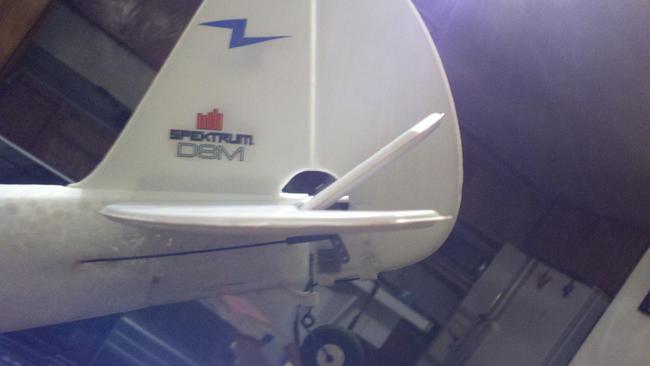
Then there's throws. I have found that if you really want your plane to perform there's a couple tricks. You can move the push wires down to the holes closest to the control surface and that will gain you quite a bit. If you want even more on programmable radios you can go into your servo travel and adjust it up past 100 all the way up to 150 (on Spektrum radios). I have found that around 145 you will start to bind the servo so go to the max it will give you physically and back it off a bit. Your mechanical adjustment has to be centered for this to work to it's best. It makes a huge difference in the planes performance, especially at low air speeds where you have less air moving over the wing. Here's a couple pictures that show the difference in just the electronic adjustment.
Before
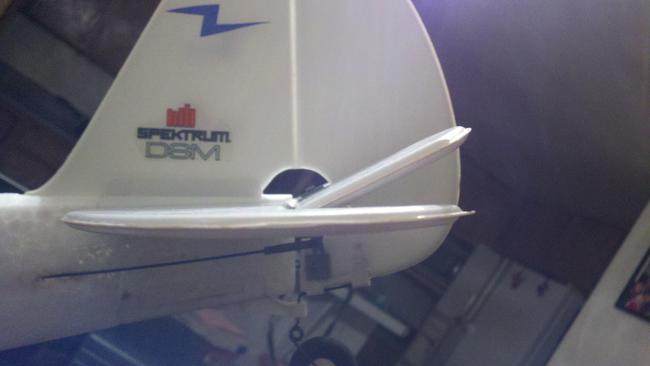
..and After.
Well that's about all I've got for right now. I hope you enjoyed this and maybe got a couple ideas of your own stirring now. I skimped on the pictures a bit because it just takes forever to load but If you have any questions or would like more details on anything discussed you can usually find me on the flitest.com forums.
Whether you liked this or didn't please give me a rating and comment so I can do better.
Thanks for your time.
Ak Flyer



Log In to reply
Log In to reply
Log In to reply
Log In to reply
Log In to reply
Log In to reply
http://www.hobbyking.com/hobbyking/store/__14396__Turnigy_Park480_Brushless_Outrunner_1020kv.html
Log In to reply
Log In to reply
Log In to reply